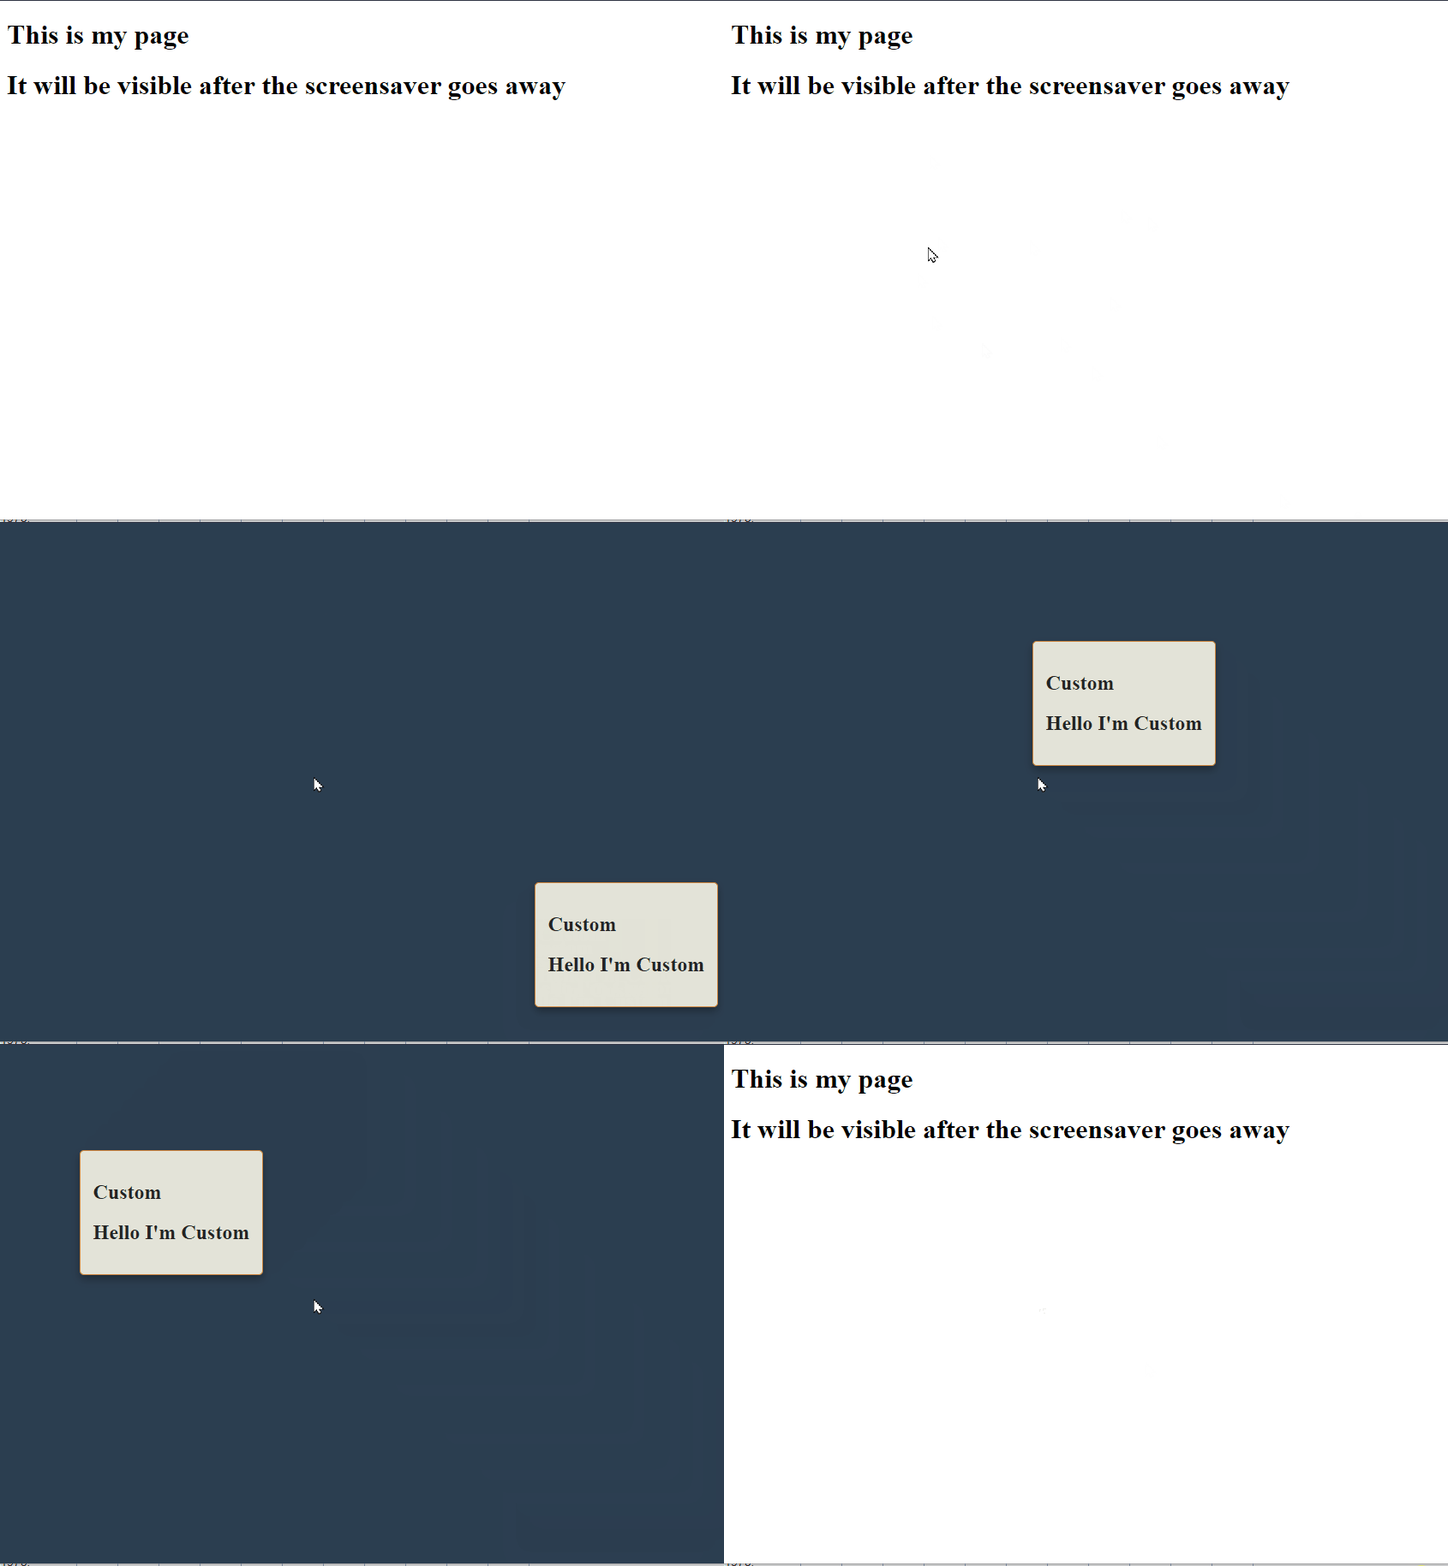
All of us know very well the screensavers in our operating systems. In this post, I’d like to show how to implement such functionality in our web application using Javascript. The animation I present is not very sophisticated and complicated, but it’s a place to start implementing your own, more complex solution here.
The code I present here is a part of my first npm package and it may be reused in your website.
Class properties
First, I defined a few class properties:
interface BaseConfig {
  text?: string
  background?: string
  baseElement?: HTMLElement | Element
  backgroundImg?: string
  animationSpeed?: 'slow' | 'regular' | 'fast'
  customElement?: HTMLElement | Element | string,
  triggerTime?: number,
}

class JsScreensaver {
  private config: BaseConfig = baseConfig;
  private windowDimensions: IDimensions = {width : 0, height : 0};
  private playAnimation: boolean = true;
  private screensaverElement: HTMLElement = document.body;
  private eventsList: string[] = ['keydown', 'mousemove'];
  private defaultScreensaver: string = `
    <div class="screensaver__element-wrapper">
      <div class="screensaver__element-content">
        <p class="screensaver__element-text"></p>
      </div>
    </div>
  `
In the BaseConfig interface, I listed all options that may be passed into the screensaver configuration.
Screensaver is initialized with the start() method. If there are no options passed as an argument, the baseConfig is loaded.
  start(config?: BaseConfig): void {
    this.config = {...baseConfig, ...config};
    this.setActionsListeners();
  }
In the next step, listeners for the events are added. Screensaver will be turned on after the time defined (in milliseconds)in the triggerTime property. The default value is set to 2 seconds. For each of the events in the array (keyup and mousemove) the addEventListener is set, with a callback function that creates the screensaver container after a certain time. If the event is triggered, the timeout is cleared and the screensaver element is removed.
  private stopScreensaverListener() {
    this.eventsList.forEach(event => window.addEventListener(event, (e) => {
      e.preventDefault();
      this.playAnimation = false;
      this.screensaverElement.remove();
    }));
  }

  private setActionsListeners() {
    let mouseMoveTimer: ReturnType<typeof setTimeout>;
    this.eventsList.forEach(event => window.addEventListener(event, () => {
      clearTimeout(mouseMoveTimer);
      mouseMoveTimer = setTimeout(() => {
        this.createContainer();
      }, this.config.triggerTime)
    }))
  }
The stopScreensaverListener method is triggered from the createContainer. The latter creates a DOM element with appropriate classes and styling. The screensaver container and element (a rectangle in this case) are appended to the body as a default, but we can define any other container, passing it into a configuration in a baseElement property.
Here, the animation is triggered. For now, I have only one animation available in this package. It’s a simple one, just a rectangle bouncing around the screen with text inside. I want to extend this package by adding more predefined animations to it. In addition, the user should be able to define its own animation as well. But that’s something that needs to be developed in the nearest future. Not, let’s focus on the existing animation.
I use the requestAnimationFrame API which I described in my previous post. In that post I showed the same animation.
In this package, it’s a little bit enhanced.
  private runAnimation(element: HTMLElement): void {
    this.playAnimation = true;
    element.style.position = 'absolute';

    let positionX = this.windowDimensions.width / 2;
    let positionY = this.windowDimensions.height / 2;
    let movementX = this.config.animationSpeed ? speedOptions[this.config.animationSpeed] : speedOptions.regular;
    let movementY = this.config.animationSpeed ? speedOptions[this.config.animationSpeed] : speedOptions.regular;

    const animateElements = () => {
      positionY += movementY
      positionX += movementX

      if (positionY < 0 || positionY >= this.windowDimensions.height - element.offsetHeight) {
        movementY = -movementY;
      }
      if (positionX <= 0 || positionX >= this.windowDimensions.width - element.clientWidth) {
        movementX = -movementX;
      }

      element.style.top = positionY + 'px';
      element.style.left = positionX + 'px';

      if (this.playAnimation) {
        requestAnimationFrame(animateElements);
      }
    }
    requestAnimationFrame(animateElements)
  }
The rectangle’s start position is set to the center. That’s calculated in the positionX and positionY variables. The movement represents the number of pixels that the object will move in every frame. Here I used the values from the configuration, letting the user set the speed of movement. In every frame, the position of the rectangle is checked, whether it’s inside the container or if it hits the border of the container. If the breakpoint values are reached, the movement values are set to the opposite, which generates the motion in the opposite direction.
Usage
Usage of the screensaver is very simple. The whole class is exported:
const classInstance = new JsScreensaver();
export { classInstance as JsScreensaver };
So you only have to import the class somewhere in your code with import { JsScreensaver } from "../js-screensaver";
And use the start() method with the configuration (or leave the config blank).
JsScreensaver.start({
  text: "Hello Screensaver",
  customElement: document.querySelector('.screen-saver'),
  triggerTime: 4000,
  animationSpeed: 'slow'
});
The customElement property lets you create the screensaver from the HTML or component in your own project. So you can inject any customized element with styling that sits in your project.
Conclusion
That’s the final result, the screensaver with a custom HTML, styling, text inside:

I did not show every line of code in this post. The whole project is available here, so you can check every method and configuration. This package is very simple and not much customizable so far, but - it has potential ;-).